Methods to Fix the lock button of an iPhone
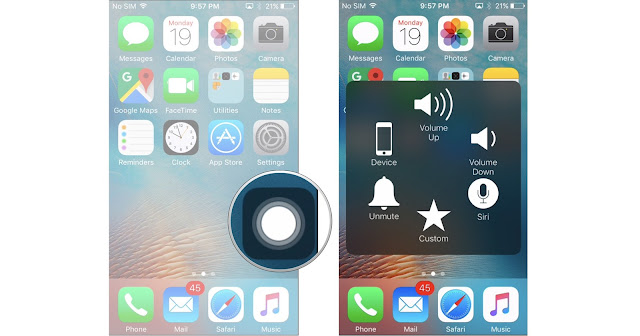
So, the power button on your iphone is not working, right? I can suggest you a very simple alternative method to solve the issue rather than going to a mobile phone repair service shop? What you want to do is, just put on the “assistive touch” option which is available in the settings of your iphone.

Just go to Settings >General>Accessibility>Assistive Touch and make it ON. Once you put on the assistive touch you can see an icon on your display. as usual you can able to move that icon around. Just touch that icon, you can see the home button, device, control canter and etc. just click open device and there you have the options for lock the screen, screen shot and etc, Once you hold your finger on lock screen option then you will get the option for power off and if you connected the power with power cable your phone will be switch it on automatically.
And if you want to replace the power button, it'll be better to visit your nearest iPhone repair in Dubai center’s or the following steps will help you to replace it yourself:
Step 1: Power off
Step 2: Remove two Penta lobe screws
Step 3: Remove display assembly (use the suction clamp during the time, it will help you
to open the phone quickly and safely)
Un screw five Philips screws, do not mix them up.
Step 4: Remove battery
Undo the battery pull tabs
Remove the two Philips screws and metal bracket
Release battery connector
Pull out two battery adhesives from the tabs
Now you can remove the battery easily
Step 5: Remove motherboard
Release all connectors on the motherboard
Release the Philips screws (use small flathead screwdriver)
Take away brackets
Remove rear camera
Do not forget to remove the sim card tray
Now you can remove motherboard easily
Step 6: Remove power button flex
Remove two Philips screws on the button
Step 7: Replace the button install power button flex
Step 8: Put mother board back
Put screws back
Connect volume and power button flex cables
Step 9: Put all brackets before tightening screws up
Step 10: Install the rear camera and put screws back (use small flathead screwdriver
Connect rear camera cable
Connect signal cable and charging port flex
Step 11: Apply the new battery adhesive sticker and install the battery
Connect the battery cable
Put the brackets and screws back
Step 12: Put the display assembly back
Connect the digitizer cable, LCD cable, front camera cable and home button cable.
Tighten the five Philips screws up fix the iPhone.
Reference: Cell phone repair in Dubai
Reference: Cell phone repair in Dubai
Comments
Post a Comment